
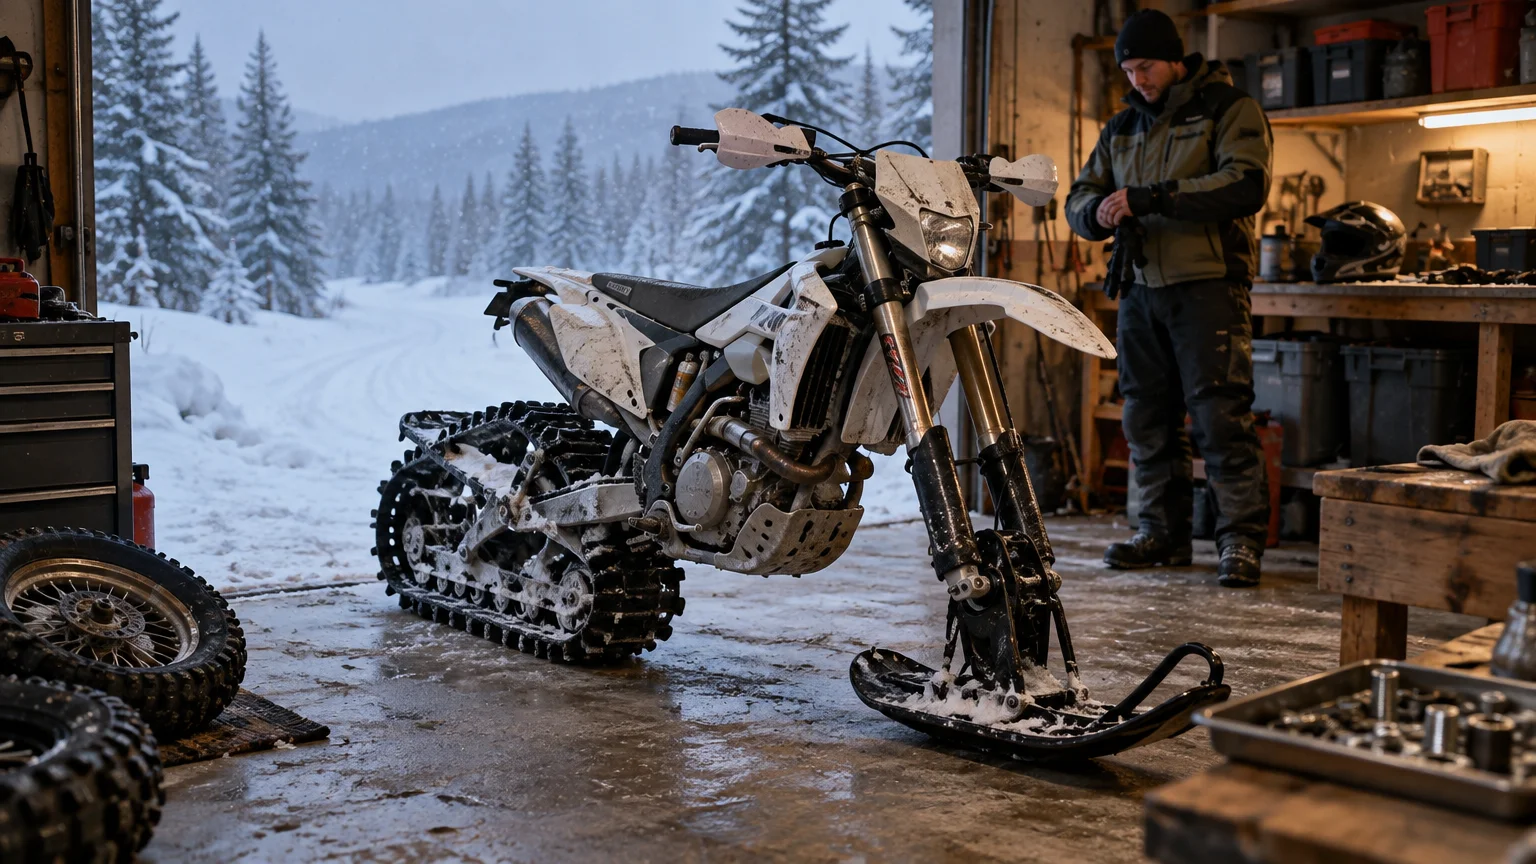
TLDR: A year round dirt bike snow bike is realistic if you start with an exactly compatible conversion system and accept the swap, inspection, and maintenance work. Verify fitment by the motorcycle’s make, model, and year—not displacement alone. During winter, watch the track, rail slides, drive chain, skags, steering, suspension, fasteners, and host-bike fluids before every ride. Snow conditions matter, too: low snow and ice can accelerate rail-slide wear.
The appeal is obvious. Instead of parking a capable dirt bike for half the year, you remove the wheels, install a ski-and-track system, and keep riding. In spring, the bike goes back onto wheels. One engine, one familiar cockpit, and two completely different seasons.
The catch is that a conversion system is not a universal accessory or a fit-it-and-forget-it winter tire. It adds a second machine around the host motorcycle, complete with its own chain, track, suspension, wear surfaces, fasteners, and inspection schedule. The one-bike plan works best for an owner who enjoys setup and preventive maintenance rather than postponing every job until something makes noise.
Can one dirt bike really work year-round?
Yes, provided an appropriate conversion system is available for the exact motorcycle and the bike itself is suitable for the intended riding. The conversion replaces the dirt bike’s front wheel with a ski and its rear wheel with a track assembly. For a closer look at that buying decision, start with what to know before converting a dirt bike into a snow bike.
Do not assume that every 250cc or 450cc dirt bike accepts the same hardware. Timbersled installation kits can contain host-bike-specific reducers, spacers, brackets, and chain-related parts. That makes fitment more specific than displacement or motorcycle category alone. Confirm the motorcycle’s make, model, model year, conversion-system model, and installation-kit part number using current manufacturer information.
This guide uses current Timbersled documentation for concrete maintenance examples. Those details are useful for understanding the ownership workload, but they are not universal specifications for every conversion brand or model. Use the manual for your exact system for torque values, chain adjustment procedures, track setup, and replacement limits. Use the host motorcycle’s own manual for engine oil, coolant, controls, battery care, and other motorcycle service requirements.
Decide whether the one-bike tradeoff fits your riding
A dual-season build reduces the need to own two complete powered machines, but it does not eliminate seasonal labor or parts storage. You will still need a clean place for the wheels, track system, ski, installation hardware, stands, and specialty tools. You also need enough downtime to perform each conversion without rushing hardware alignment or skipping inspections.
| Riding or ownership condition | What it means for the build | Best response |
|---|---|---|
| Consistent, deeper snow | Snow provides the environment the track system is designed to operate in, including lubrication for the rail slides. | Perform the complete pre-ride inspection and remain alert for changing snow coverage. |
| Mixed trail with thin or exposed sections | Snow available for slide lubrication can disappear across hardpack, ice, dirt, or road crossings. | Reduce exposure to poor coverage and inspect the slides and track frequently. |
| Frequent low-snow or icy riding | Extended operation without adequate snow can produce excessive slide wear and contribute to track failure. | Do not treat marginal coverage like normal riding; change the route or wait for better conditions. |
| No protected workspace | Seasonal parts can become corroded, mixed up, or installed incorrectly when the conversion is rushed outdoors. | Organize hardware by location and complete the work in a dry, well-lit space. |
| Infrequent winter use | Conversion labor and storage remain even when the machine sees only a few snow days. | Compare the workload with renting, borrowing, or keeping the bike on wheels. |
Timbersled specifically states that rail slides need snow for lubrication and warns that extended operation in low-snow or icy conditions can cause excessive slide wear and contribute to track failure. That is a mechanical limitation, not a challenge to see how far you can ride down a bare road.
Build a repeatable conversion-day process
The smoothest seasonal swap is the one you document the first time. Before removing anything, photograph the motorcycle from both sides and capture hose, cable, brake, spacer, and fastener positions. Lay removed wheel hardware out in order, then package it by assembly rather than throwing every spacer into one coffee can.
- Verify the current fitment information for the exact motorcycle and conversion system before buying or installing hardware.
- Obtain the installation instructions, conversion-system manual, and host-bike manual. Do not borrow torque values from a different model year.
- Wash the motorcycle before disassembly so dirt cannot hide damaged threads, leaking seals, or worn bearings.
- Label the front-wheel and rear-wheel hardware separately, including the original installation position and orientation of spacers.
- Follow the kit-specific installation sequence. Use specified fasteners, locking methods, torque values, and adjustment procedures.
- After installation, move the steering and suspension through their available travel while checking that controls, hoses, cables, and brake components are not stretched or trapped.
- Inspect the ski, track, chain, suspension, brakes, and fasteners before the first ride. Recheck the system after its initial break-in rides as directed by the manufacturer.
Do not improvise around missing reducers, spacers, brackets, or chain components. A part that looks like a basic sleeve may establish alignment or clearance. Stop and identify the correct component instead of replacing it with whatever fits through the hole.
Inspect the snow-bike system before every ride
The conversion system and the host motorcycle have separate maintenance needs. Timbersled’s pre-ride material calls for checks involving the track, rail slides, chain tension, skags, steering, suspension, and the host bike’s fluids and controls. It also directs riders back to the motorcycle owner’s manual for applicable host-bike maintenance. The complete 2024 Timbersled ARO and RIOT owner’s manual is a useful example of how the two maintenance layers are separated.
- Track: Look across the complete track for cuts, missing or damaged lugs, embedded debris, and structural damage.
- Rail slides: Check wear and consider whether the day’s snow will provide adequate lubrication.
- Drive chain and related guides: Verify adjustment by the procedure for the exact system; inspect for unusual wear or damage.
- Ski and skags: Check condition, retention, and damage that could affect steering.
- Steering and controls: Turn the bars and operate the controls before moving. Nothing should bind or snag.
- Suspension: Inspect mounting points, visible damage, and loose hardware.
- Brakes: Confirm normal operation and inspect exposed components before committing to terrain.
- Host motorcycle: Check the fluids, controls, leaks, and service items specified by its manufacturer.
- Fasteners and guards: Look for looseness, missing retainers, contact marks, or components that have shifted.
Pay particular attention to a freshly installed or recently serviced drive chain. Timbersled says chain tension on specified ARO and RIOT systems should be checked before riding, and that initial operation can loosen the chain as it stretches and the sliders break in. Use the exact system’s adjustment procedure rather than applying a generic measurement.
Track damage deserves the same caution. Timbersled instructs owners to inspect the complete track and replace it if a rod is damaged. A damaged structural component is not something to monitor casually for the rest of the season.
Expect winter to expose different wear points
Summer dirt riding brings dust, mud, water, impacts, and heat. Winter adds packed snow, ice, frozen controls, condensation, road brine, and long periods in a cold trailer. The bike may look cleaner after a powder day, yet corrosive residue can be working inside fastener heads and around exposed metal.
The recurring inspection areas are the rail slides, drive chain and its guides, skags, track, suspension pivots, brake parts, bearings, and exposed fasteners. Wear will vary with the system, setup, snow coverage, riding style, and route. That is why a fixed universal replacement interval would be less useful than regular inspection against the manufacturer’s limits.
The host motorcycle does not stop needing normal service because a track is installed. Engine oil, coolant, air filtration, battery condition, drivetrain interfaces, and controls remain motorcycle-specific. Cold operation and the loads associated with snow riding may also change how quickly service comes due, so record hours and work from the correct host-bike manual rather than a summer calendar alone.
Transport it like exposed winter machinery
Open-trailer transport can cover the machine in salty road spray before the ride begins. Use secure attachment points and suitable tie-downs, keep straps away from sharp edges and moving parts, and stop after the first section of road to verify that the load has not shifted. Timbersled’s transport guidance also calls for confirming that fuel and oil caps are installed, removing the key, and considering a cover for open-trailer transport.
A cover can reduce direct exposure, but it must be secured so it does not flap against plastics, graphics, hoses, or controls for hours. After a salty trip, unload and clean the machine rather than letting brine dry into seams and fasteners. Riders heading into remote or avalanche terrain also need a separate safety plan; review the broader risks of dirt biking in snow before treating a converted bike like ordinary trail transport.
Make hardware organization part of the build
Small installation parts create big delays six months later. Store wheel spacers, axle parts, brackets, fasteners, and conversion-specific tools in separate containers. Label each container with the motorcycle, model year, assembly location, and installation-kit identifier. A phone photo placed in the bin can preserve spacer order and orientation.
Durable custom labels and decals are useful for parts bins, toolboxes, trailer identification, and spare-parts containers. They improve organization, but they are not substitutes for guards, protective film, correct fasteners, or safety equipment. Keep mechanical protection and labeling as separate jobs.
Swap back and store the track system correctly
Do not park the dirty conversion kit in a corner when spring arrives. Wash away mud, road salt, and other corrosive residue, then let the system dry thoroughly. Inspect it while the season is still fresh in your mind, record needed parts, and handle repairs before the next winter rush.
Timbersled’s storage guidance includes cleaning away corrosive salt and acids, storing the machine dry and off the ground with the track hanging freely, and avoiding plastic tarps that can trap condensation. Follow the storage procedure for your system, including any lubrication or tension instructions specific to that model.
- Clean and dry the track system before long-term storage.
- Inspect the track, rail slides, chain, skags, suspension, bearings, and mounting hardware.
- Record wear and order known replacement parts while model information is easy to verify.
- Store installation hardware in labeled, sealed groups without trapping moisture.
- Support the system as its manufacturer directs rather than leaving the track compressed on a damp floor.
- Use a breathable cover or storage arrangement that does not trap condensation.
- Reinstall the dirt-bike wheels with the correct parts, procedures, and torque specifications from the host-bike manual.
- Perform a complete dirt-bike pre-ride inspection before returning to the trail.
The real appeal is one familiar bike with two maintenance routines
A one-bike, two-season build can be a fantastic use of a dirt bike. You keep the controls and engine you know, stretch the riding calendar, and turn the spring and fall swaps into planned garage work instead of buying another complete powered machine.
But the winning version is not simply a dirt bike with a track bolted on. It is a correctly matched host bike and conversion system supported by organized hardware, model-specific instructions, snow-condition awareness, disciplined pre-ride checks, careful transport, and dry seasonal storage.
Start by verifying exact fitment and downloading both manuals. Then make a conversion checklist and decide where every removed part will live. If that level of process sounds satisfying rather than annoying, the year-round build is probably a strong fit.
References
- Kit Contents – Polaris Online Publication Portal
- Track Lubrication – Polaris Online Publication Portal
- Pre-Ride Checklist – Polaris Online Publication Portal
- 2024 Timbersled ARO / RIOT Owner’s Manual – Polaris Online Publication Portal
- Timbersled Drive Chain Maintenance | Timbersled Snow Bike Systems
- Timbersled Track Maintenance | Timbersled Snow Bike Systems
- Transporting the Snow Bike – Polaris Online Publication Portal
- Storing Your Snow Bike | Timbersled Snow Bike Systems