Welcome to Frozen Moto Motorsports

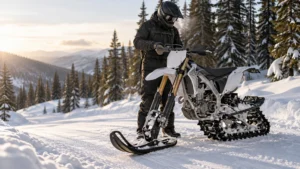
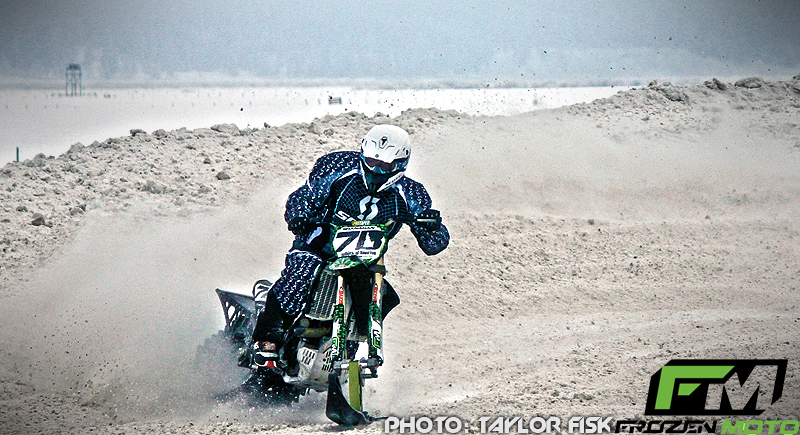
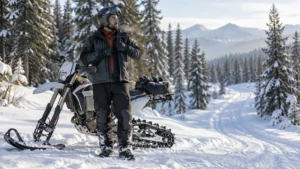
At Frozen MOTO Industries we strive to take a dirt bike and produce a snow bike that is both technologically advanced and driven through rider innovation!

The Track System

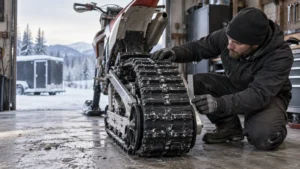
The Frozen MOTO SMX and SMR track systems are a patent pending design that incorporates true dirt bike geometry back into this exciting and growing snow bike industry.  At Frozen MOTO we have painstakingly designed these systems around the bike from your bars to the drive and foot pegs then right back to the last idler wheels!

The standard industry 121 track is used in the SMX & SMR track systems. Track location and positioning is a critical aspect when riding differing conditions and having a variable attack angle is critical to get that true “dirt bike” feel.  The patent pending “Broken Rail” allows Frozen MOTO to be the only industry manufacturer allowed to create the versatile attack angle built into every SMX or SMR snow bike, regardless if your a racer or mountain free rider this is an infinitely adjustable system to fit your needs!

The award winning Rekluse clutch is a perfect compliment to your Frozen MOTO system for additional bike/snow bike performance!

Factory Engineered Suspension

Being a company in the emerging snow bike industry Frozen MOTO was faced with some unique and additional challenges. We were amazed when Elka Suspension stepped up to engineer the next level in snow bike suspension and reengineered shocks for our unparalleled technology.

Partnering with Elka Susupension gives us a dirt and snow sports industry leading suspension manufacturer. Together we are able to couple the most amazing and technologically advanced susupension ever seen in the snow biking industry with the Frozen MOTO labeled track system!

Our team has worked and tested for nearly a thousands of hours last and we continue to give Elka rider driven seat time to create a perfect balance of both single speed and dual speed compression rates giving you protection from both the slower, or big, and faster, or smaller repeated, hits as well. By providing rebound options available on the Frozen MOTO, the Elka Stage 5 platform gives the system an extra container and high speed compression adjustment! You pick your needs and Frozen MOTO builds to those needs again industry firsts in manufacturing and rider driven control.

Frozen MOTO also utilizes one shock on the outside to allows the SMX and SMR track systems to fly thru and alleviate additional strain and stress on the complete track system and rider allowing you to take the most aggressive line through those otherwise miserable whoops on the track and braking bumps on the trail!

What that means to Frozen MOTO and more importantly to you the customer is that Frozen MOTO strives to have rider driven advancment. The SMX and SMR can also be adjusted depending on rider weight and conditions through an interchangeable spring rate coil over which then utilizes fluid not air to match the ever changing challenges and conditions that mother nature can provide allowing you additional hours of riding! From deep powder filled winter days to getting in and out of spring riding on those frozen trails, Frozen MOTO has you covered!

Contact Me

Owner
Dan Shanahan
Dan@FrozenMOTO.com

Billeted Ski System

The unique front ski system is not only functional but design with style and flair being a solid billeted piece giving you strength and integrity for years to come! The Frozen MOTO ski system utilizes a four piece bolted design, not a welded design giving you the ability to replace specific parts without the added cost of a complete replacement should you have a little too much fun.

The bolted area is designed as a stress point so they can be easily repaired or replaced on scene and does not allow for the creation of additional damage to your complete snow bike/dirt bike system. The ski plate is designed and bolted directly to the fork and to the unique spindle. Four bolts creating the designed brake away location give you the ability to insert new bolts and continue to ride. This system has been extensively tested and has passed testing with “flying” colors!

The Polaris IQ footprint of the spindle is mounted to the Curve Industries XS ski creating the most advanced and reliable snow bike front end to date! You can also attach any Polaris IQ mountable ski to the spindle.

Learn More

We love tricking out our bikes, ATVs, and more. Check out our recommendation for vehicle sticker decals for the best quality graphics products.

Two-Mount Mounting System

The Frozen MOTO mounting system is a a two piece design that aids in the patent pending technology. This system combines a small fit mount that connects any bike with a swing arm to the main mount. The first mount attachs to a main frame mount that then attaches to the second pivot point in the geometry at the hub.

What else? If you need graphics and stickers for your moto click here.

Read More

The Latest

Cooling-System Checks Before Slow Technical Riding

TLDR

Perform your dirt bike cooling system check with the engine completely cold. Verify coolant at the model-specified inspection point, clear both radiators, examine hoses and clamps, trace the overflow hose, and look around the water pump for leakage. Do not open a hot radiator. If coolant keeps disappearing, continuously leaks from the pump area, or exits the overflow repeatedly, stop treating it as a top-off problem and diagnose the cause.

Slow technical riding is hard on a liquid-cooled dirt bike. The engine is working, road speed is low, and there may be little clean air moving through the radiators. Mud, grass, snow, bent guards, or a recently crushed radiator can further reduce airflow. A ten-minute inspection in the garage is much easier than dealing with steam and coolant loss halfway through a rocky climb.

Honda includes coolant level, cooling-system condition, and hose condition in its CRF250R/RX pre-ride inspection guidance. That is the right mindset for any liquid-cooled off-road motorcycle, but the correct level location, coolant specification, cap rating, bleeding process, and service limits still come from the manual for the exact bike. Honda’s CRF250R/RX pre-ride inspection guidance

Dirt bike cooling system check at a glance

Check Healthy condition Stop and investigate
Coolant level At the specified level when checked by the method in the bike’s manual Level is repeatedly low, fluid is contaminated, or the correct inspection point cannot be confirmed
Radiator cores and fins Air passages are open, and the cores are free of packed mud, snow, grass, and heavy fin damage Core is leaking, badly crushed, loose, or still obstructed after careful cleaning
Hoses and clamps Hoses are correctly routed, dry, pliable, and free of cracks or abrasion; clamps are secure Wet joint, split hose, severe chafing, swelling, hardened rubber, or a displaced clamp
Mounts, braces, and guards Radiators sit securely without a guard or brace contacting a hose or core Loose mount, crash distortion, rubbing component, or damage that places stress on a fitting
Overflow or siphon hose Correctly routed, open, and not pinched, melted, or packed with debris Blocked or damaged hose, persistent discharge, or routing that can trap or restrict flow
Water-pump area Dry, apart from any limited behavior explicitly described as normal by the model manual Continuous coolant leakage, an increasing drip, residue that returns after cleaning, or mixed fluid
Fan and wiring, if equipped Fan, connector, wiring, and fuse are visibly intact; operation follows the manual’s test method Damaged blades, disconnected wiring, blown fuse that returns, or failure during the specified test

Start only with a cold engine

Park the bike upright as its manual requires, switch it off, and let it cool completely. Do not use a bare hand on the radiator cap as a temperature test. A cooling system can remain hot and pressurized after the outside begins to feel cooler.

Removing a radiator cap from a hot engine can release pressurized coolant and cause serious burns. Honda gives that warning in its CRF450L owner’s manual, which also provides a useful manufacturer example of a broader cooling-system inspection.

Before opening anything, clean loose dirt away from the cap and filler area. Contamination that falls into an open radiator creates a new problem. If the bike is still warm, leave the cap alone and continue only with external visual checks.

Find the correct coolant inspection point

Do not assume every dirt bike is checked the same way. Some motorcycles require inspection at the radiator filler neck. Others use a translucent reserve or recovery tank with level marks, and some procedures involve both. Radiator level, reserve-tank level, and overflow behavior are related but not interchangeable.

Open the owner’s manual and identify four things before adding fluid: the inspection location, required bike position, whether the engine must be cold, and the specified coolant. If you cannot confirm those details, postpone the fill rather than guessing from another model or relying on coolant color.

A single small correction may be reasonable when the manual permits it and the reason is understood. A level that drops again is evidence of a fault. Photograph the cold level or mark the recovery tank externally, then recheck it under the same conditions. Consistent conditions make a trend much easier to recognize.

Inspect the radiators for airflow and damage

Use a bright light and inspect both the front and rear faces of each radiator. Mud often looks harmless from the front while forming a dense mat behind a guard. Snow and slush can also pack into a guard or brace during cold riding. Remove the obstruction using a cleaning method that will not fold fins or drive debris deeper into the core.

A few bent fins are not automatically a stop-riding event, and there is no useful universal percentage at which a radiator becomes unsafe. What matters is whether a meaningful section has lost airflow, coolant is leaking, the tubes are crushed, or the radiator has shifted enough to stress its fittings. When in doubt, compare both sides and inspect the suspect area closely rather than trying to straighten it aggressively at the trailhead.

Check that shrouds, braces, and fan hardware are secure. After a tip-over, look for fresh contact marks where a guard may have been pushed into the core. A radiator can appear straight from outside while a mount, hose neck, or rear corner has moved.

Trace every hose, clamp, and outlet

Follow the coolant hoses from end to end. Look for cracks at bends, abrasion near the frame, swollen sections, hardened rubber, wet clamp joints, and pale or colored residue left by dried coolant. Verify that clamps have not walked away from their intended positions. Use the model manual for clamp orientation and tightening requirements; blindly tightening a clamp can damage a hose or fitting.

Next, trace the overflow or siphon hose. It should follow the specified route without a kink, pinch, melted section, or plug of mud. Honda’s CRF450L inspection procedure specifically calls for checking leaks, deteriorated or cracked hoses, loose clamps, radiator mounting, unobstructed siphon-hose routing, clogged fins, and leakage at the water-pump bleed hole. Those are useful inspection categories even though the component layout and limits remain model-specific.

Read leakage at the water pump carefully

Find the water-pump cover and any weep or bleed opening identified by the service literature. Clean the area, then distinguish an old stain from active fluid. Check beneath the bike as well; skid plates can catch coolant and make the actual source difficult to locate.

For the 2020 CRF450L, Honda says a small amount of water-pump weeping may be normal, while continuous coolant leakage requires correction. That statement is a model-specific example, not permission to ignore leakage on another motorcycle. Use your bike’s manual to determine what its opening indicates.

Continuous dripping, residue that quickly returns, or fluid contamination deserves diagnosis before a demanding ride. Repeatedly replenishing the radiator may conceal seal, hose, cap, radiator, or internal trouble while allowing the condition to worsen.

Check the fan without improvising a test

If the motorcycle has a cooling fan, inspect the blades, connector, wiring, fuse, and clearance around the radiator. Confirm that nothing can enter the fan when it starts. Use the manual’s test method to verify operation; do not bridge random terminals or apply power to an unidentified connector.

A fan does not make clogged radiators acceptable, and a clean core does not compensate for an inoperative fan on a bike that depends on one during slow running. If the specified fan test fails, diagnose the circuit before heading into terrain where speed and airflow will remain low.

Treat repeated coolant loss as a diagnosis problem

Coolant does not need to leave a large puddle for the system to have a problem. A hot leak can evaporate on the engine, spray into dirt, collect in a skid plate, or discharge from the overflow while riding. Dried residue around a cap, hose joint, radiator seam, or pump opening can be more revealing than the garage floor.

Stop and investigate when any of these conditions appear:

  • The cold coolant level drops again after a correct fill.
  • Coolant continuously leaks from the water-pump area.
  • The overflow hose repeatedly discharges coolant during ordinary operation.
  • A radiator is wet, cracked, crushed, or loose.
  • A hose is split, swollen, abraded, or leaking at a fitting.
  • The engine shows its model-specific overheating warning after the cores are clean and coolant is correctly filled.
  • Oil or coolant has an abnormal appearance suggesting possible cross-contamination.

A model-specific pressure test can help locate leaks that do not appear during a cold visual inspection, but use the prescribed equipment and pressure limit. If you lack the correct adapter, specification, or diagnostic procedure, professional service is cheaper than damaging a radiator or forcing coolant into places it should not go.

Cold-weather storage, transport, and snow use

A warm garage can hide inadequate freeze protection until the bike spends a night in an open trailer. Before subfreezing storage or transport, verify that the installed coolant meets the motorcycle manufacturer’s requirements for freeze protection and corrosion control. Do not estimate protection by color or assume a previous owner used the correct fluid.

Honda’s 2005 CRF250X manual provides a good example of why specifications matter: for that model, Honda specified a 50/50 antifreeze-water mixture for most conditions, warned that excessive antifreeze concentration reduces cooling performance, and stated that concentrations below 40 percent do not provide adequate corrosion protection. It also cautioned against mineral-heavy water. Those figures belong to that CRF250X procedure, not every dirt bike.

Use the exact coolant and concentration specified for your year and model. If you are preparing a host motorcycle for winter conversion, cooling-system condition belongs on the larger compatibility and maintenance list covered in what to know before converting a dirt bike into a snow bike. No universal snow-bike coolant recipe should replace the host-bike and conversion-kit documentation.

After riding through snow, mud, or slush, inspect behind radiator guards before parking the bike. Clear packed material, then check for crash damage and fresh leakage. For winter conditions beyond the machine itself, review the broader safety risks of dirt biking in snow before committing to a route.

What not to guess

There is no responsible universal answer for coolant color, concentration, capacity, radiator-cap pressure, bolt torque, fan-switch test, bleed sequence, or replacement interval. Even closely related motorcycles can use different components and procedures across years.

Use the owner’s manual for routine checks and specifications. Use the exact service manual when the job involves draining, bleeding, pressure testing, electrical diagnosis, pump repair, cap testing, or torque-sensitive disassembly. If the documentation calls for a procedure or tool you do not have, that is the point to pause—not improvise.

The pre-ride standard

Before slow technical riding, you want a cold bike with coolant at the correct model-specific location, open radiator fins, dry external surfaces, sound hoses, secure radiators, an unobstructed overflow route, and no unexplained pump leakage. Check fan-equipped bikes by the manufacturer’s method.

If the level stays stable and the inspection is clean, move on to the rest of the pre-ride routine. If coolant loss or overheating returns, stop topping off and start diagnosing. Slow terrain already asks plenty from the cooling system; do not send the bike into it with a warning sign unresolved.

References

  1. Pre-ride Inspection | CRF250R/RX | Honda Owners Manual
  2. Coolant

    **Cooling System Inspection**

    1. Check t

  3. p1†`
  4. Coolant

    Your motorcycle’s liquid cooling system d