
TLDR
For correct snow bike track alignment, the rubber track should run centered between the suspension rails, with approximately equal clearance from each hifax to its corresponding track edge. Check alignment before making the final tension adjustment, change only one variable at a time, and use the procedure for your exact conversion kit and model year. If the track repeatedly walks sideways, stop chasing the adjusters and inspect the rails, idlers, bearings, axle hardware, drivers, track components, and suspension geometry.
Track alignment and track tension are connected, but they are not the same adjustment. A track can be centered and still be too loose or tight. It can also have apparently correct tension while rubbing one rail. The reliable sequence is inspection, alignment, tension, and then one final alignment check.
What correct snow bike track alignment looks like
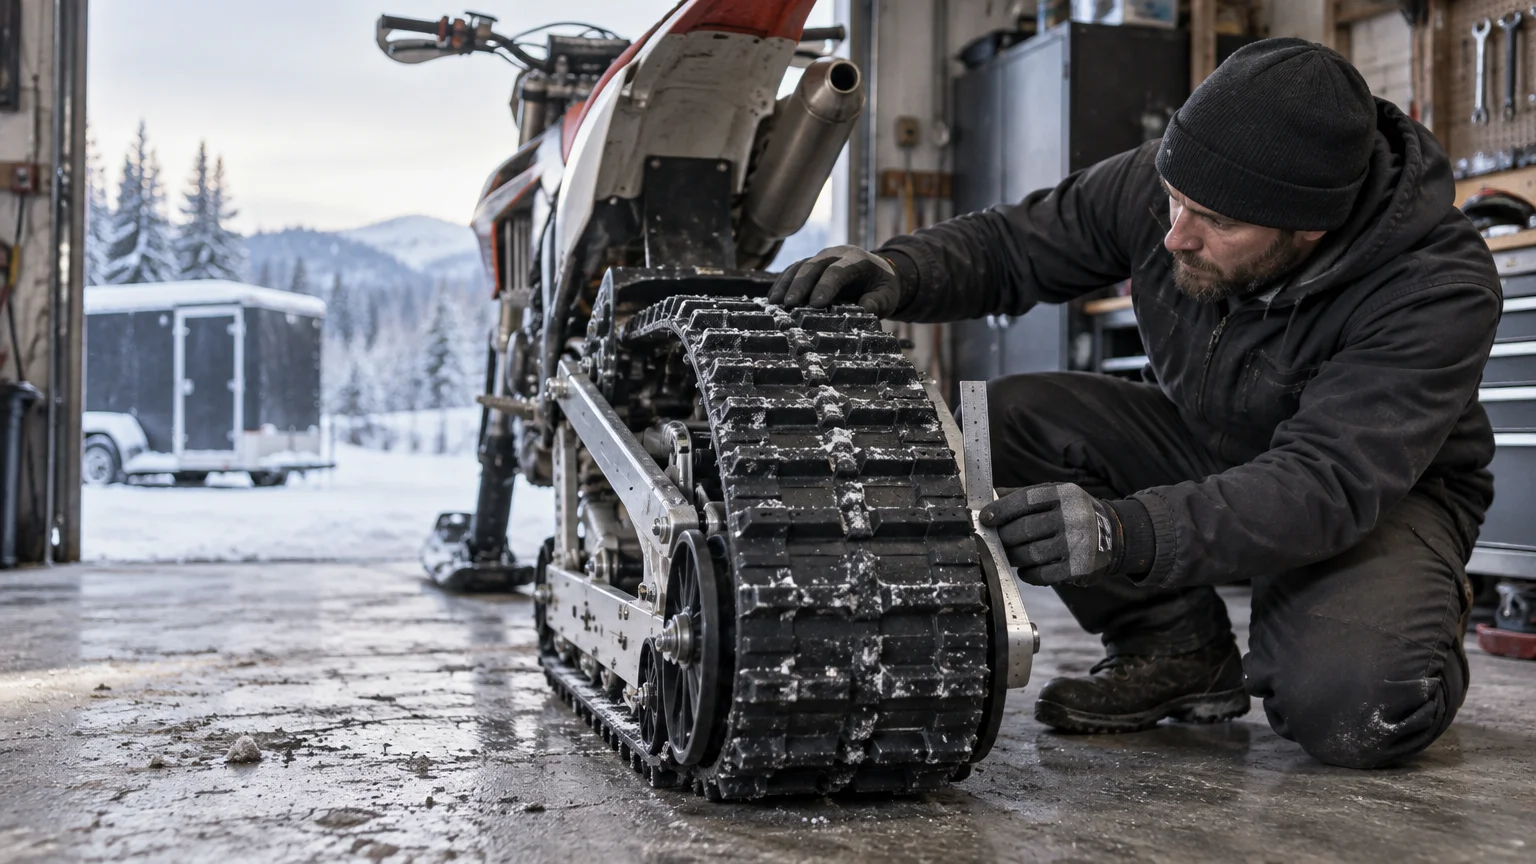
A correctly aligned track travels evenly along the rail slides, commonly called hifax or hyfax, rather than crowding one side. Timbersled’s track-maintenance guidance describes a properly aligned track as centered on the suspension and running evenly on the hifax. With the engine stopped, the horizontal distance from each hifax to the corresponding track edge should be approximately equal.
Do not judge alignment from one snow-packed glance. Ice around an idler or debris inside the suspension can make the clearances look uneven. Clean the undercarriage, rotate or operate the system only as the kit manual directs, stop the engine, and then compare both sides in the same location.
Alignment is only one part of the setup. Track tension controls how much slack the track has under the manual’s specified measurement method. Suspension geometry includes rail position, angle of attack, and the conversion assembly’s relationship to the motorcycle. Adjusters can influence alignment and tension, but they cannot straighten a bent rail or repair a failing bearing.
Read the symptom before touching an adjuster
| Symptom | Likely area to investigate | First move |
|---|---|---|
| Track consistently crowds one rail | Lateral alignment, unequal adjustment, debris, or hardware condition | Clean the suspension and compare left-to-right clearance with the engine stopped. |
| Track skips or ratchets under load | Excessive looseness, driver engagement, or damaged components | Stop riding and check tension by the exact manual procedure; inspect drivers and track condition. |
| Both hifax wear rapidly | Excessive tension, poor snow lubrication, or geometry trouble | Verify tension and consider recent hardpack, ice, or low-snow operation. |
| One hifax wears faster | Track alignment, rail condition, idler or bearing condition, or geometry | Check centering first, then inspect the worn side and its opposite hardware. |
| Track centers briefly but walks again | Loose axle or adjuster hardware, damaged parts, worn bearings, or unresolved geometry | Stop making repeated corrections and perform a full mechanical inspection. |
| Track is centered but difficult to rotate | Excessive tension, ice buildup, bearing trouble, or another mechanical bind | Do not assume alignment is the problem; inspect and use the manual’s tension specification. |
These are diagnostic starting points, not a ranked list of failures. The same symptom can have several causes. For example, hot or rapidly wearing hifax can result from a tight track, but Timbersled also warns that extended operation on ice, hardpack, or low-snow surfaces may deprive the slides of the snow they need for cooling and lubrication.
Inspect the hardware before adjusting alignment
Start with a cold, clean machine on a stable work surface. Securely support the rear system using the method specified by its manufacturer. Remove the ignition key or otherwise prevent an accidental start while your hands are near the track. Never measure beside a moving track. Timbersled specifically instructs riders to keep clear of moving parts and take measurements only after the engine has stopped. Timbersled’s official track-maintenance procedure
Before moving either adjuster, inspect the complete path the track follows:
- Track lugs, clips, rods, and edges for cuts, distortion, missing material, or other damage.
- Left and right hifax for unequal wear, deep grooves, melting, or a thin section.
- Rear and internal idler wheels for damage, wobble, rough bearings, or obvious side play.
- Suspension rails for bends, cracks, impact marks, or inconsistent spacing.
- Axle, adjuster, and locking hardware for looseness, damage, or unequal starting positions.
- Drivers and drive-area components for damage or abnormal engagement marks.
- The suspension cavity for packed ice, branches, straps, or other debris.
- Conversion-kit mounting points and suspension geometry for loose or displaced hardware.
Do not operate a visibly damaged track. Timbersled states that a damaged track, including one with damaged track rods, should not be used and may require replacement. If you find a bent rail, cracked component, seized bearing, or damaged driver, adjustment is no longer the job. Repair the fault first.
A safe alignment workflow
The exact measurement points, tension load, adjustment direction, fastener torque, and locking procedure vary between systems. Find the owner’s or service manual for the kit’s exact model and model year before beginning. This is especially important on a used conversion where the motorcycle, suspension, track, or rails may have been changed.
- Record the starting point. Photograph both adjusters and note exposed thread or another manual-approved reference. This gives you a path back if the result gets worse.
- Clean and inspect the system. Remove packed snow and ice, then resolve damaged, loose, or binding parts before making an alignment correction.
- Observe the track using only the manufacturer’s prescribed procedure. Keep clothing, tools, hands, and feet away from the moving system.
- Shut off the engine. Wait for every component to stop before approaching the track or taking a measurement.
- Compare both sides. Measure or visually compare the horizontal clearance between each hifax and the corresponding track edge at equivalent points.
- Make one small correction. Follow the kit manual for which adjuster to move and how far. Avoid several turns at once.
- Settle and recheck the track. Use the manual-approved operating or rotation procedure, stop the system again, and compare the same clearances.
- Repeat in small increments until the track runs evenly. If one correction produces little change or the track will not hold position, stop and inspect for a mechanical fault.
- Set final track tension using the specified location, force, deflection, and temperature conditions in the manual.
- Recheck alignment after tensioning. Secure locking hardware and torque fasteners to the kit-specific specification.
If you are still learning how the conversion system fits into the complete machine, review what to know before converting a dirt bike into a snow bike. Exact fitment and model-specific maintenance are part of conversion ownership, not details to solve with a generic measurement.
Timbersled’s correction method is a model-specific example
Timbersled’s published guidance illustrates why small corrections matter. In that procedure, a track running too far left is corrected at the right-side tension bolt, while a track running too far right is corrected at the left-side bolt. The guidance calls for half-turn adjustments, followed by another operating and inspection cycle.
Do not automatically apply those directions to a Camso, Yeti, older Timbersled, modified suspension, or another conversion kit. Adjuster layout and service procedures differ. Treat the Timbersled sequence as an example of controlled adjustment, not a universal rule: identify the side, make one small manual-approved change, allow the track to settle, stop the engine, and measure again.
Why alignment must be followed by a tension check
Moving a rear-axle adjuster changes more than lateral tracking. It can also move part of the axle rearward, increasing track tension. That means a previously correct tension value may no longer be correct after centering the track.
Timbersled’s procedure addresses alignment before final tension adjustment and calls for another alignment check afterward. It also warns that an overly loose track can skip on the drivers, while an overly tight track can accelerate hifax wear. Tightening both sides until the track stops wandering is therefore not a sound fix. It may hide one symptom while creating heat, drag, or slide wear.
Use the exact tension method in the manual. A bare deflection number is meaningless without its measurement location, applied load, suspension condition, and model context. The 2017 Camso DTS 129 manual, for example, includes application-specific setup and calls for a tension recheck after first use. Those historical DTS 129 values should not be transferred to another system. Current model documentation matters as well; the 2025 Timbersled Ripper manual provides its own model-specific inspection and maintenance context.
When the track will not stay centered
A healthy system should respond predictably to a small adjustment and retain its setting once the hardware is secured. If the track centers on the stand but walks again after a short ride, repeated adjuster movement can make diagnosis harder. Return to mechanical inspection.
Check wheels, bearings, and axle hardware
An idler that tilts under load can steer the track even if it looked acceptable while stationary. Check each wheel for smooth rotation, side play, damage, and signs of contact. Verify that axle and locking hardware are intact and secured according to the manual.
Compare the rails and hifax
Uneven hifax wear may be the consequence of track walk, but it can also affect how clearly you read the clearance. Compare rail shape and spacing, look for impact damage, and inspect both slides along their full length. Replacing slides without addressing a bent rail or alignment fault only resets the wear clock.
Inspect the track and drivers
Look for damaged rods, clips, edges, or lugs, along with abnormal driver marks. A damaged track may not travel consistently even after careful adjustment. Driver skipping also deserves immediate attention because looseness is only one possible cause.
Verify suspension geometry
Alignment adjustments cannot compensate for incorrect installation geometry. The historical Camso DTS 129 manual uses an angle-of-attack check in which the track and rail should contact a flat surface evenly along the rail length; it warns that incorrect adjustment can reduce performance and contribute to premature wear. The appropriate geometry check for your machine must come from its own documentation.
Do not mistake poor snow lubrication for bad alignment
A centered track can still eat hifax in marginal conditions. Rail slides depend on snow entering the suspension for cooling and lubrication. Long stretches of ice, hardpack, or thin snow can create heat and premature wear even when alignment is correct.
Consider where the symptom appeared. If wear or a hot-plastic smell followed a low-snow road, frozen lake, or heavily packed trail, inspect the slides and track before assuming an adjuster moved. Surface choice affects both traction and machine wear; understanding how snow texture changes a snow-bike line can help you avoid prolonged operation where cooling snow is scarce.
Final pre-ride check
- Track sits approximately centered between the hifax on both sides.
- No damaged rods, clips, lugs, track edges, rails, wheels, or drivers are visible.
- Idlers rotate smoothly without obvious wobble or excessive play.
- Track tension meets the exact kit and model-year procedure.
- Axle, adjuster, and locking hardware are secured to the specified torque.
- Track still runs true after the final tension adjustment.
- No tools, stands, straps, or loose objects remain near the suspension.
- A brief post-service inspection is planned after the first ride.
Center it once, then find out why it moved
Good snow bike track alignment is controlled and repeatable: inspect first, compare both sides with the engine stopped, make one small manual-approved correction, set final tension, and verify alignment again. The goal is not merely to make the track look centered in the garage. It must remain centered without abnormal heat, rubbing, skipping, or uneven wear.
Stop adjusting and seek qualified service if the track is damaged, a rail appears bent, a bearing is rough or loose, the system binds, hardware will not hold torque, or the track repeatedly walks after careful adjustment. That is the line between routine setup and a component or geometry problem—and crossing it with another turn of the adjuster can get expensive fast.