
TLDR
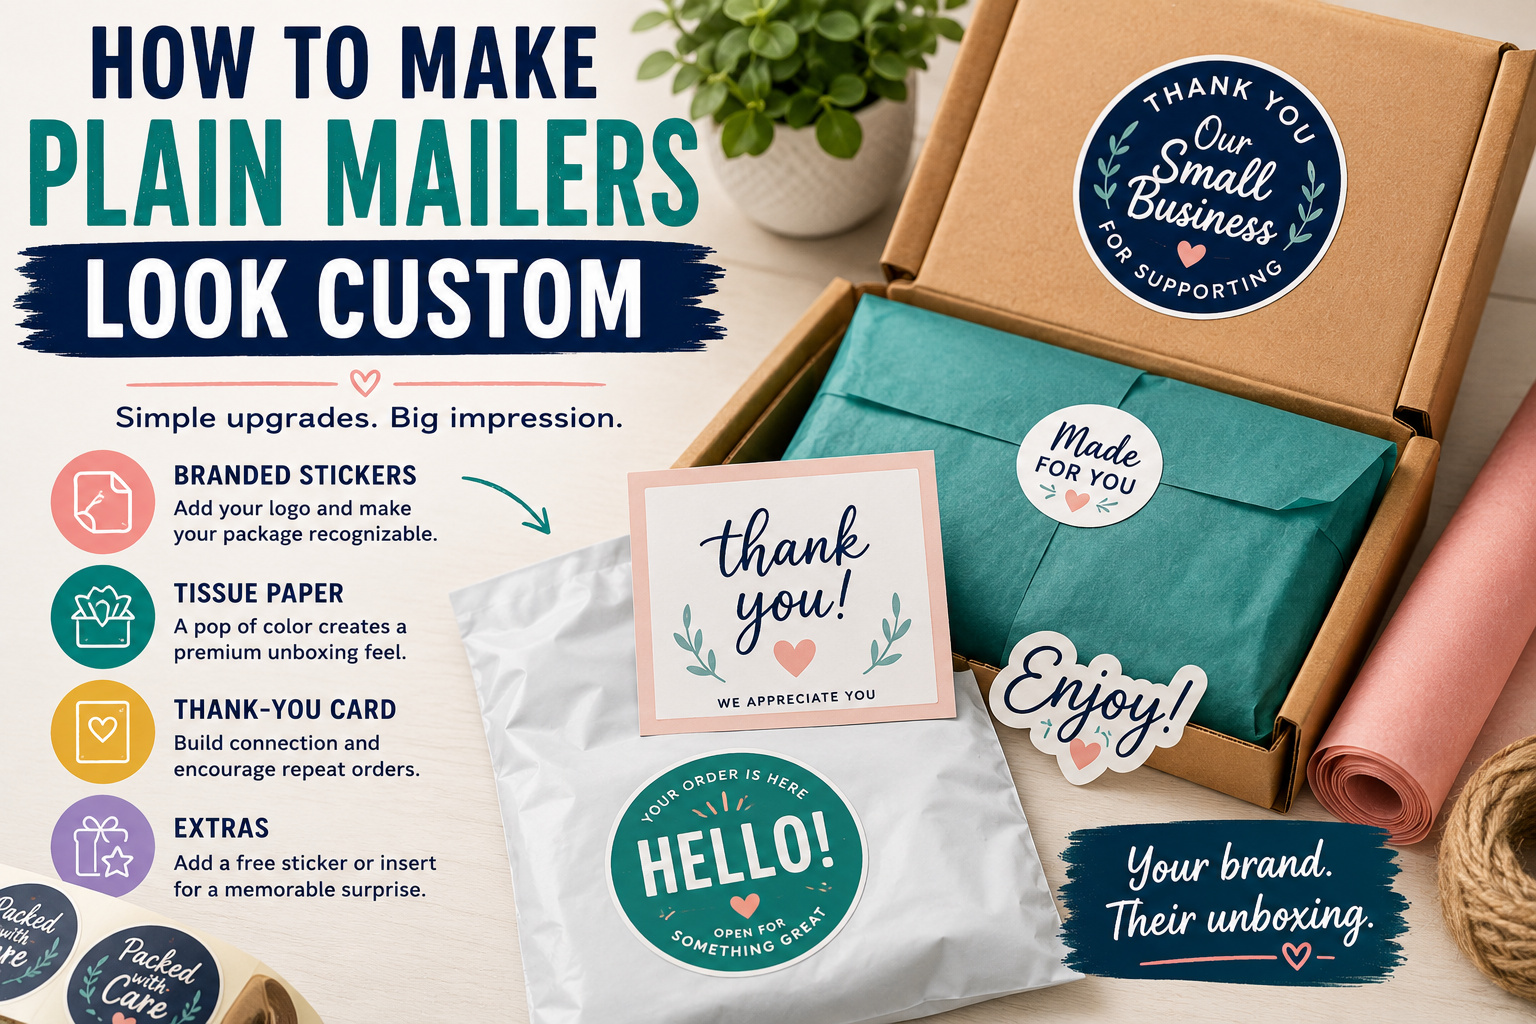
Plain boxes, kraft envelopes, and stock poly mailers can still create a polished customer experience. Add one or two consistent branded elements, such as a logo sticker, colorful sealing label, tissue paper, or thank-you card.
Start with the outside of the mailer, then improve the presentation inside. You do not need to cover every surface with your logo. A simple, repeatable packaging system usually looks better and takes less time to assemble.
Fully custom packaging can look great, but it is not always the most practical place for a small business to spend money.
Custom-printed boxes and poly mailers may require higher quantities, extra storage, longer lead times, and a commitment to one package size. That becomes awkward when your products, order volume, or branding are still changing.
Fortunately, learning how to make plain mailers look custom does not require replacing all your shipping supplies. A well-placed sticker, a consistent color palette, and one thoughtful insert can turn an ordinary package into something that feels intentional.
The goal is not to disguise the fact that you used a stock mailer. The goal is to make the package clearly belong to your business.
Start With a Consistent Packaging System
Before ordering labels or decorating boxes, decide what you want every customer package to include.
A basic packaging system might use:
- One plain kraft box or mailer
- One branded sticker on the outside
- One color of tissue paper
- One thank-you card
- One small promotional sticker for the customer
This is enough to establish a recognizable look without making fulfillment complicated.
Choose two or three brand elements and repeat them consistently. These might include your logo, a specific color, a short phrase, a mascot, or a simple pattern.
Consistency matters more than the number of decorations. A kraft mailer with one clean green label and matching tissue paper will usually look more considered than a package containing five unrelated colors, three fonts, striped tape, and a thank-you sticker designed during an entirely different phase of the business.
Add a Large Logo Sticker to the Outside
A custom sticker is one of the simplest ways to make a stock mailer look branded.
Place it where the customer will notice it immediately, such as:
- In the center of a plain box
- Near the top of a poly mailer
- Across the flap of a rigid envelope
- Beside the shipping label
- Over the seam of a tissue-wrapped product
A larger sticker can function almost like direct printing. It gives you space for a logo, illustration, pattern, or short message without requiring a custom box order.
Custom label and packaging stickers can be made in different sizes and shapes, allowing the design to fit your mailer rather than forcing every package into a standard round-label layout. Custom shapes are especially useful for mascots, logo marks, badges, and branded seals.
For small bubble mailers, a two- or three-inch sticker is often enough. Larger shipping boxes may need a wider label or a design with stronger contrast.
Do not make the sticker so large that it interferes with the shipping label, barcode, or package seams.
Use Contrast to Make the Design Visible
The sticker needs to stand apart from the mailer.
A dark label can look sharp on a white poly mailer. Bright colors work well against brown kraft paper. A mostly white logo may need a colored background when placed on a white box.
Packaging design guidance commonly recommends choosing sticker colors that contrast with the package beneath them. White mailers can support bright colors and bold type, while kraft packaging often works well with simpler or more natural-looking designs.
Before ordering, place a digital mockup of the sticker over a photo of the actual mailer. Better yet, print the artwork on ordinary paper and hold it against the package.
This will reveal several problems that are easy to miss on screen:
- The colors blend into the mailer
- The logo is too small
- Thin type is difficult to read
- The sticker shape looks awkward
- The design competes with the shipping label
- The size feels out of proportion
A sticker can look excellent by itself and still disappear once it is placed on the package.
Turn the Sticker Into a Seal
A packaging sticker can do more than display a logo. It can also close tissue paper, secure a folded note, or act as a simple tamper indicator.
Good sealing locations include:
- Over the top flap of a paper envelope
- Across the center of folded tissue paper
- On the edge of a product sleeve
- Around a belly band
- Over the opening of an inner bag
- On a thank-you card envelope
A round or oval label works well for seals because it has no sharp corners to catch during handling. A custom die-cut shape can add more personality, but keep narrow points and delicate extensions away from package edges.
For larger quantities, die-cut roll labels can make repetitive packaging faster. Labels stored on rolls are easy to organize and peel, and custom shapes allow the seal to match the rest of the brand.
The seal should be easy for the customer to open. Avoid placing a permanent vinyl sticker across a reusable zipper or closure unless the package is meant to be torn open.
Print a Short Message on the Sticker
Your main packaging sticker does not have to contain only a logo.
A short message can make the package feel more personal and give the customer a reason to notice it.
Possible phrases include:
- Made for you
- Packed with care
- Thanks for supporting our shop
- Good things inside
- Open for something fun
- Handle with happiness
- Your order has arrived
- Made to stick
- Thanks for your order
- Please reuse or recycle
Keep the message brief. Shipping packages are viewed quickly, often alongside several other boxes and mailers.
One clear phrase is more effective than trying to fit your logo, website, social handles, mission statement, slogan, and full return policy onto a three-inch sticker.
Create a Pattern With Smaller Stickers
A single large logo is not the only option.
Small stickers can be placed in a loose pattern across a plain mailer. This creates the feeling of custom-printed packaging while allowing you to change the arrangement from order to order.
A pattern might use:
- Miniature logos
- Brand icons
- Stars, flowers, bolts, or leaves
- Small illustrations
- Product-related symbols
- A mascot in different poses
- Seasonal shapes
This works especially well on rigid mailer boxes and paper shipping envelopes. On flexible poly mailers, use fewer stickers so the package does not become stiff or difficult to handle.
Keep the pattern controlled. Three or five small stickers can look playful. Thirty-seven stickers may cause the shipping team to quietly remove your name from the holiday party invitation list.
Brand the Inside of the Package
The outside of a shipping package experiences dirt, labels, weather, and warehouse handling. The inside is where the presentation can feel cleaner and more deliberate.
You can brand the inside with:
- Tissue paper in a brand color
- A sticker closing the tissue
- A patterned paper liner
- A printed thank-you card
- A product care card
- A QR code leading to instructions
- A small free sticker
- A reorder or referral offer
Packaging stickers are often used to seal tissue paper, secure inserts, and add branding to otherwise plain mailers. This allows a business to create a coordinated look without replacing its basic shipping materials.
Try to reveal the order in layers. The customer opens the plain outer mailer, sees neatly wrapped products, and then finds the main item and thank-you message.
It does not need to become an elaborate unboxing performance. The product still needs to be easy to reach.
Add a Thank-You Card
A thank-you card gives the package a clear finishing touch.
The front can feature a logo, illustration, product photo, or simple thank-you message. The back can include practical information such as:
- Customer support details
- Product care instructions
- A QR code
- Return directions
- A discount code
- A social media handle
- A request for a review
Custom note cards can be used as thank-you notes, boutique packaging inserts, appointment follow-ups, and customer gift enclosures. Leaving some open space also gives you room to add the customer’s name or a short handwritten message.
Keep the card useful. A customer should not need to sort through several inserts that all say roughly the same thing.
One card can usually handle the thank-you message, support information, and next step.
Include a Sticker the Customer Can Keep
There is a difference between a sticker used on the package and a sticker included as a small gift.
The packaging sticker promotes your brand during delivery. A free sticker can continue circulating after the package has been opened.
Customers may place it on:
- Water bottles
- Laptops
- Notebooks
- Toolboxes
- Coolers
- Phone cases
- Storage bins
- Shipping stations
The free sticker should be something the customer would willingly use. A large corporate logo may work for a brand with a devoted following, but a mascot, illustration, short phrase, or product-related joke often has broader appeal.
You can order custom vinyl stickers in a shape that follows the artwork. A durable laminated sticker also feels like a real product rather than a thin paper label removed from the packaging line.
Do not hide the free sticker beneath loose filler where it can be mistaken for part of the packing material. Place it beside the thank-you card or attach it with a small paper band.
Use QR Codes Carefully
A QR code can connect plain packaging to a digital experience without covering the mailer in text.
The code might lead to:
- Product instructions
- A setup video
- Care information
- A reorder page
- A review form
- A loyalty program
- A playlist
- A downloadable guide
- A social media account
Place the code on a flat section of the mailer or on an insert card. Avoid wrapping it around a corner, crease, or heavily curved package.
The design needs strong contrast and enough clear space around the code. Test it with several phones before printing the full quantity.
And explain where the code goes. “Scan me” is not a very compelling offer. “Scan for setup instructions” gives the customer a reason to use it.
Match the Upgrade to the Mailer
Different mailers benefit from different treatments.
| Plain Mailer Type | Simple Custom Upgrade | Good Secondary Detail |
|---|---|---|
| Kraft box | Large logo sticker | Tissue sealed with a matching label |
| White poly mailer | Bright contrasting sticker | Thank-you card inside |
| Kraft bubble mailer | Dark logo seal | Small customer giveaway sticker |
| Rigid paper envelope | Custom-shaped closure label | Printed note card |
| Plain shipping box | Wide branded label | Patterned stickers inside the lid |
| Clear product bag | Branded header or seal | Product information card |
The decoration should fit the package rather than fighting it.
A small rigid envelope may only need one round seal. A large mailer box can support a wider sticker, tissue paper, and an insert without looking crowded.
Build a System the Packing Team Can Repeat
Packaging needs to look good at order number ten and remain manageable at order number ten thousand.
Before choosing an upgrade, consider:
- How long it takes to apply
- How much storage it requires
- Whether it works across several mailer sizes
- How difficult it is to train new employees
- Whether the sticker is easy to peel
- Whether the design changes seasonally
- Whether every order needs the same insert
- How much each package costs to assemble
A complicated bow, stamp, sticker, tissue, ribbon, tag, and handwritten-card routine may be manageable when shipping three orders a day. It can become a bottleneck when order volume increases.
Create one standard package, then add limited variations where they matter. For example, first-time buyers might receive an instruction card, while returning customers receive a loyalty offer.
Avoid Making the Mailer Harder to Ship
Branding should not interfere with delivery.
Keep decorative stickers away from:
- Shipping barcodes
- Address information
- Box openings that must be inspected
- Required warning labels
- Carrier markings
- Ventilation holes
- Return labels
- Reusable closures
The package still needs to protect the order. Do not choose a thinner mailer simply because it matches your brand colors, and do not replace necessary cushioning with decorative tissue paper.
The mailer is still shipping equipment. Looking good is its second job.
Start With One Upgrade
You do not have to redesign the entire packaging process at once.
Start with the most visible improvement:
- Order a branded packaging sticker.
- Apply it consistently to every mailer.
- Add matching tissue or a thank-you card.
- Review how long packing takes.
- Ask whether the result still feels clear and uncluttered.
- Add another element only when it serves a purpose.
This approach keeps costs controlled and makes it easier to identify which details customers notice.
It also lets the packaging change with the business. If your logo, colors, product range, or mailer sizes change, updating a sticker is far easier than working through thousands of preprinted boxes.
Plain Does Not Have to Look Generic
The easiest way to make plain mailers look custom is to repeat a few recognizable brand elements.
Use one strong sticker on the outside. Carry the same colors or artwork into the package with tissue paper, a thank-you card, or a customer giveaway. Keep the design clean, and make sure the system is easy to repeat.
Customers do not know what your packaging cost. They see whether the order arrived safely, whether the presentation feels considered, and whether the package clearly came from your business.
A plain mailer can handle all three.